Free template · Word
Assembly instructions template.
Instructions with exploded views that people can follow almost without words: the parts, the tools, one picture per step and the final checks.
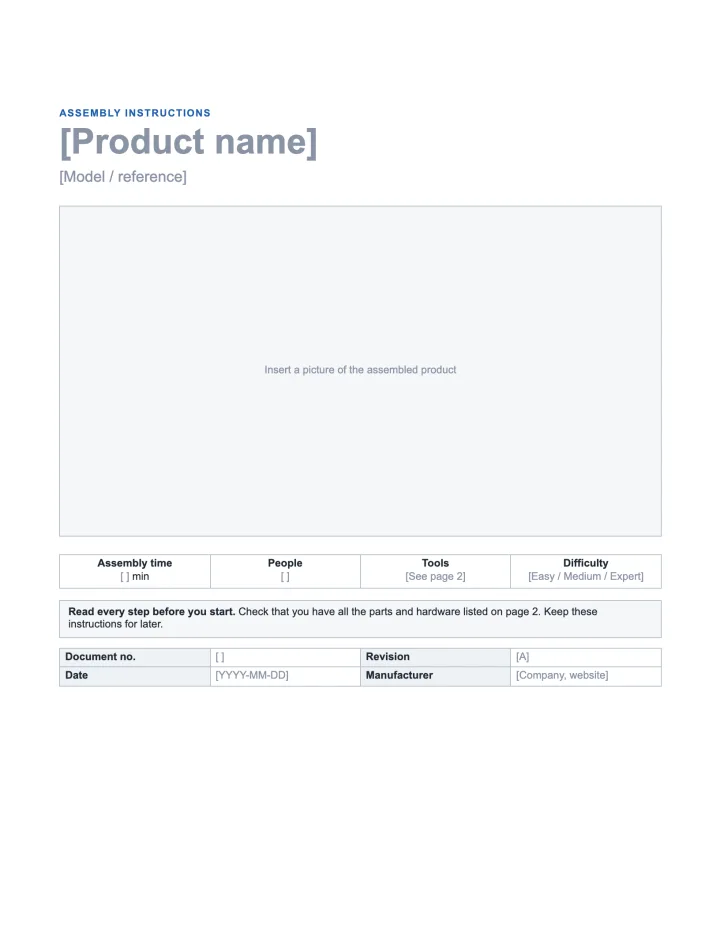
From the box to the last check. In four pages.
Cover, parts list and steps. Page 4 holds the final checks, the missing-parts contact and the revision history.
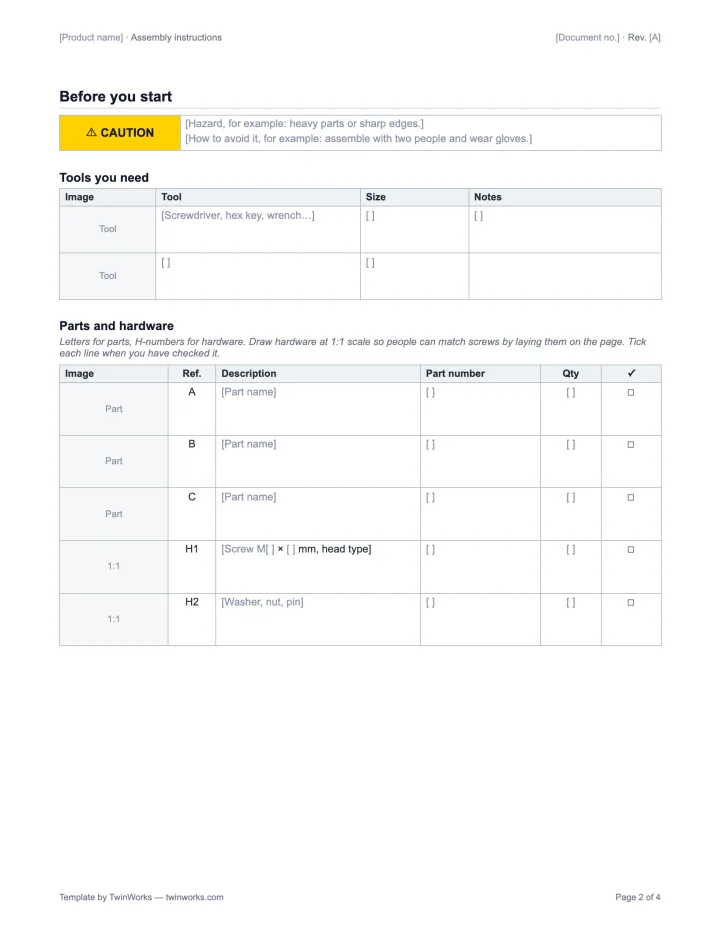
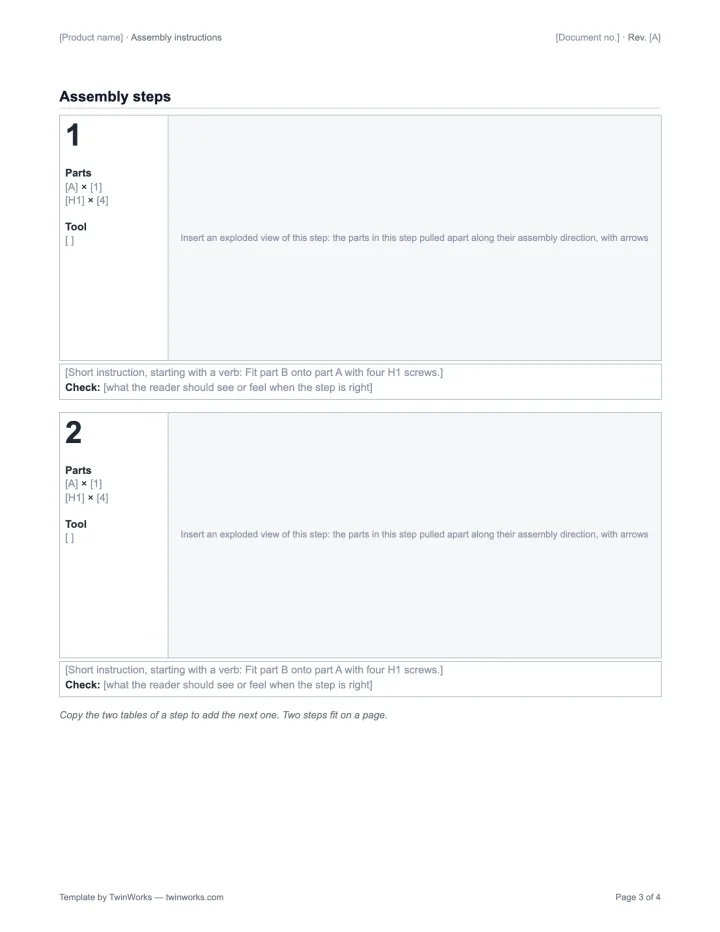
- Cover Product picture, model, assembly time, people, tools, difficulty.
- Before you start A safety note with its signal word, hazard and precaution.
- Tools you need Picture, name and size of each tool.
- Parts and hardware Letters for parts, H-numbers for hardware drawn at 1:1, quantities, tick boxes.
- Assembly steps Big step number, parts and tool, exploded view, instruction and check.
- Final checks Screws tight, parts move freely, nothing left over, labels in place.
- Missing parts Who to contact, and what to give them.
- Revision history Each change to the instructions, dated.
Anatomy of a good step.
A big number, the parts and the tool, an exploded drawing with arrows, and a check.
One drive motor. Three steps.
From an open-source conveyor model (ConveyorBeltCAD by Erin Ng, MIT licence): parts A and B, four H1 screws and one hex key.
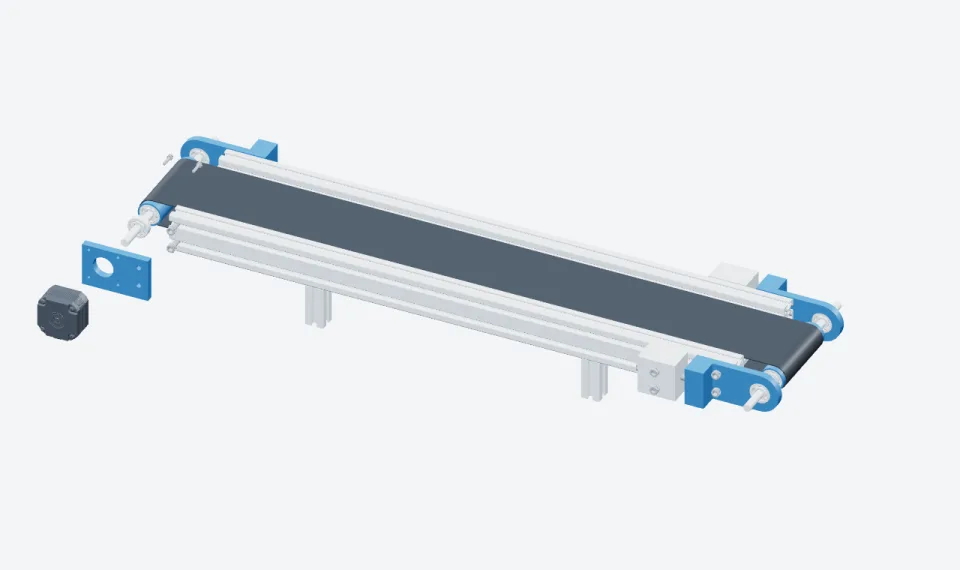
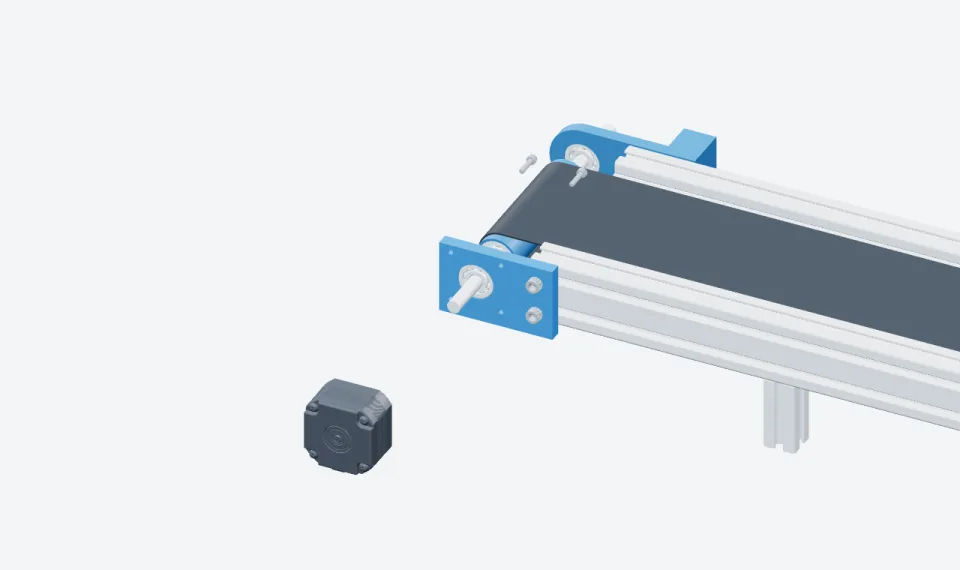 1. Position the motor bracket
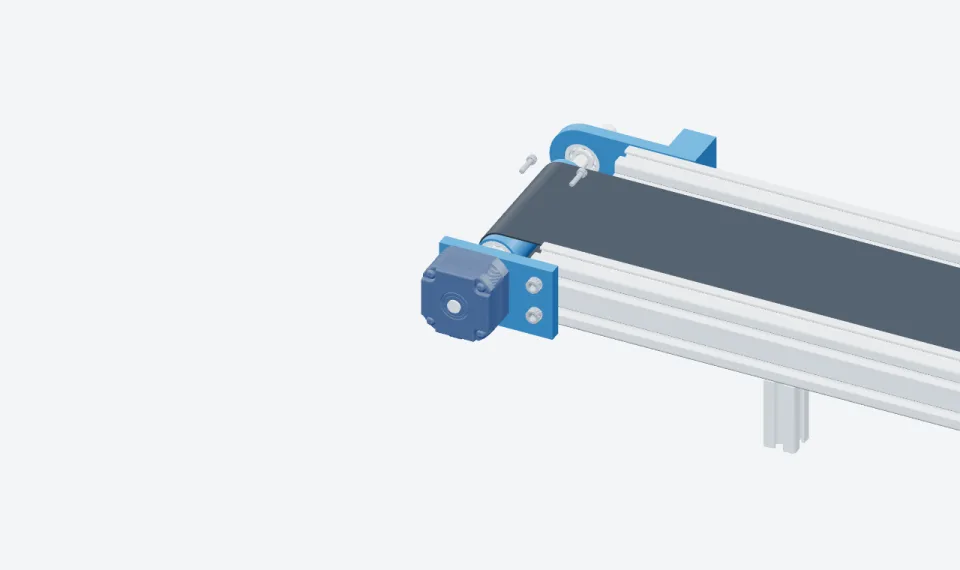 2. Fit the drive motor
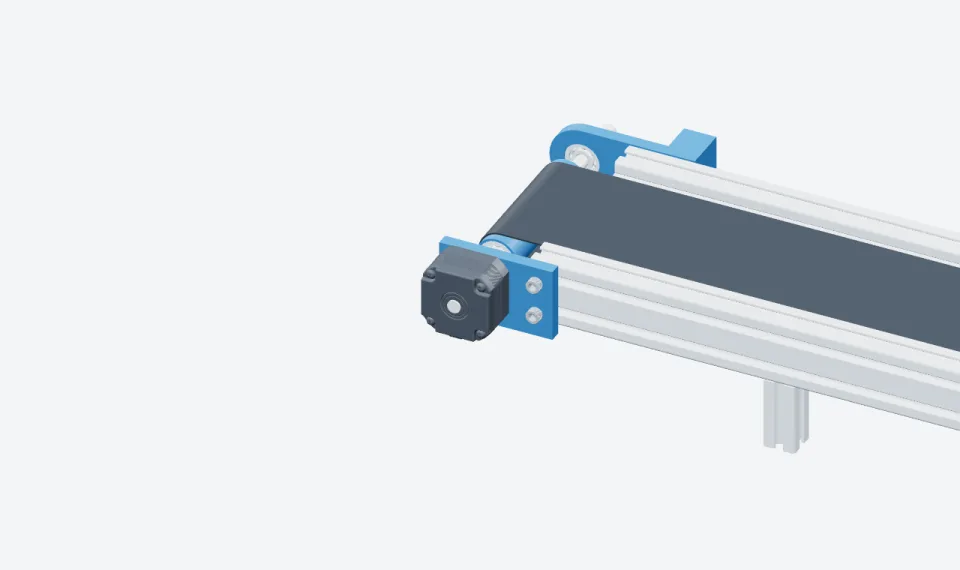 3. Insert the mounting screws
Illustrative sequence with authored positions and steps. Add the approved fastener specification and tightening requirements before release.
Five rules for instructions people can follow.
- Count before you write. Lay out every part and fastener, give each a reference, and show the hardware at 1:1.
- Follow the real build order. Group the parts that go in together into one step.
- Keep the same viewpoint. Turn the product only when the work moves to another side.
- Show, then tell. The picture carries the step; the sentence under it confirms the action and gives the check.
- Test with a stranger. Watch someone who has never seen the product assemble it, and fix every place where they stop.
TwinWorks Animate
Get the exploded views from your STEP file, free.
Animate takes a STEP or STP assembly up to 100 MB, explodes it in your browser and animates the joints it detects. Download the MP4, with no account. Joint detection is in beta.
For an assembly line, see interactive assembly instructions and CAD to work instructions.
Questions
What is in this assembly instructions template?
This free assembly instructions template is a Word document (.docx, 4 pages, US Letter). It has a cover with the product picture, assembly time, number of people, tools and difficulty; a safety note; a tools table; a parts and hardware table with an image, a reference, a part number, a quantity and a tick box on each line; numbered steps, each with the parts and tool it uses, a large exploded-view image, a short instruction and a check; final checks; a contact for missing parts; and a revision history. It is free to use and adapt, with no account and no email.
What should assembly instructions include?
A parts and hardware list with quantities, the tools needed, numbered steps with one action and one picture each, safety notes where they apply, checks after key steps and at the end, and a contact for missing or damaged parts.
How do you make assembly instructions with pictures?
Use one picture per step that shows only the parts of that step, pulled apart along the direction they go in, with arrows. Exploded views from the CAD model work best; you can make them in your CAD software or free in your browser from a STEP file with TwinWorks Animate.
Why draw the hardware at 1:1 scale?
So people can lay a screw on the page and match it by size. Screws of the same type in different lengths are easy to mix up, and a life-size drawing removes the doubt.
What is the difference between assembly instructions and a work instruction?
Assembly instructions are usually written for customers or installers who assemble a product once. A work instruction is written for trained operators who repeat a task at a station, with takt time, quality checks and sign-off. Both list parts, tools, steps and checks.
Is this assembly instructions template free?
Yes. The Word template is free to download, use and adapt for your own products, with no account or email address. The small TwinWorks credit in the footer can be removed.
From CAD model to assembly guide.
Import the 3D model and your existing instructions into TwinWorks, set up the part movements for each step, and let your experts review and approve the guide before it reaches customers or the line.
Updated